No-Code Programmatic SEO in Webflow
In this article, we cover a general overview of the no-code tools we used in our programmatic stack. Specifics on how to use and connect these tools are covered in our Programmatic SEO Course, but this summary will give you an understanding of the basic structure and process of executing a programmatic site. As everyone’s use cases will be different, we’ll also link to some alternative tools (add link) that you may decide to use based on your specific needs.
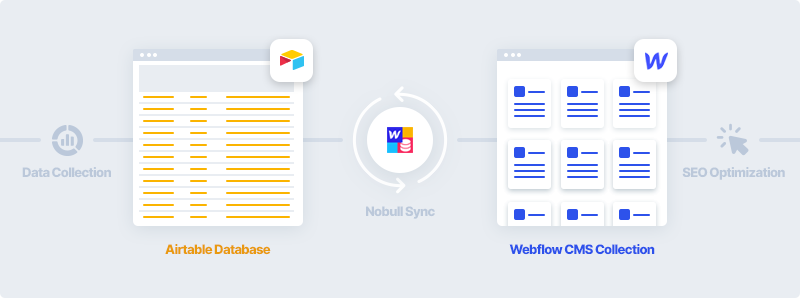
Below is a brief overview of what we will cover in building out our programmatic SEO website:
- Data Sources How to find resources from which to pull data
- Data Collection How to automate the data collection process using a web scraper called Octoparse
- Airtable Database How to import data into Airtable to use as the database for our site
- Webflow CMS Template How to build out a Webflow site template that dynamically pulls data from our CMS collection and automatically generates pages associated with our data points
- SEO Optimization How to optimize our Webflow site for SEO purposes
Data Sources
Based on your targeted keywords, you’ll first want to find a good resource to pull data. Some common sources and methods are as follows:
- Scraping Websites There are many tools (add link) that allow you to scrape useful data from websites. Make sure to avoid collecting intellectual property or personal information to ensure you don’t run into legal issues.
- Government Statistics and Data Many governments around the world have open source data repositories for different industries. Here’s a list of over 70 free data sources.
- Virtual Assistants Online marketplaces such as Fiverr, Upwork, Freelancer, and Guru can be used to find virtual assistants all over the world who can collect and enter data for an affordable hourly rate.
- Internal Data If you already have an active community, marketplace, or e-commerce website you can potentially reuse your own data to build unique pages.
- Data APIs Although this would normally be better suited for builders with coding experience, there are tools such as NoCodeAPI that can be used to connect with APIs using no code.
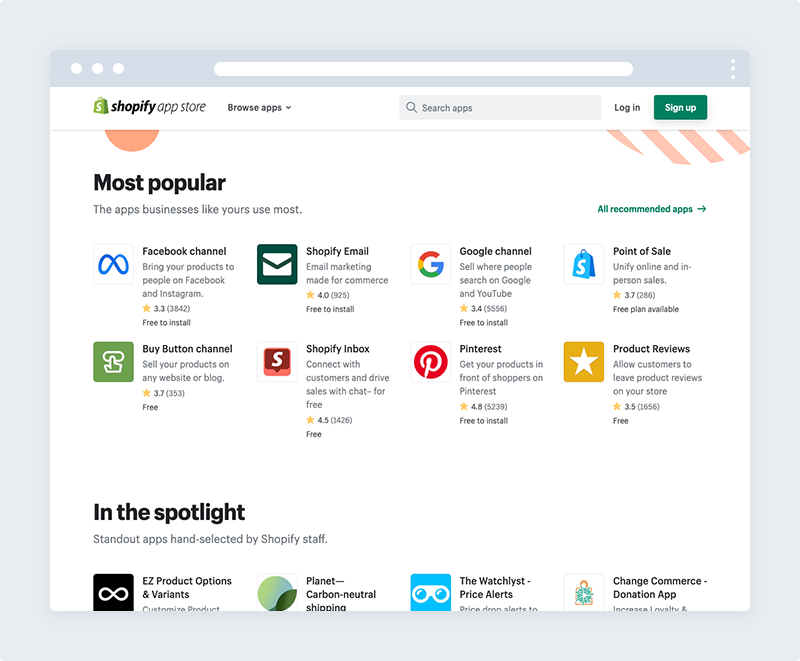
In the Programmatic SEO Course, we built a directory of the best Shopify apps organized by category (based on the example set by Preetam Nath of DelighChat). We found that the ideal source to collect this data was the Shopify app store. In the next section we’ll cover different ways to collect data once you’ve found your source.
Data Collection
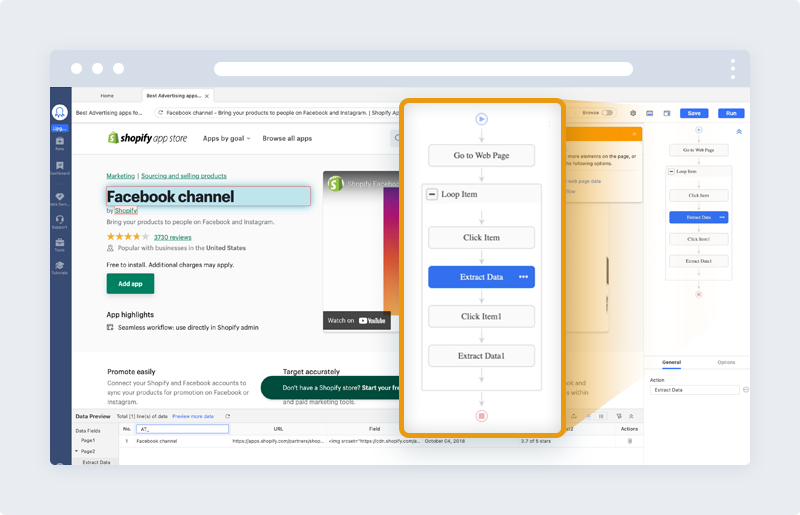
Usually, most websites do not provide users with the functionality to save a copy of the data displayed on the web. The only option is for a person to manually copy-and-paste the data. Fortunately, web scraping can execute this process automatically.
Octoparse is the tool we chose for scraping our data. It’s is a desktop-based app that’s more robust than other scrapers we’ve tried and easier to setup workflows for collecting data. The free plan gives you a generous 10,000 records per export. That’s probably more than most people will need but you can always upgrade if you’re pulling down a ton of information.
Airtable Database
Before you start to import your data into Airtable, you need to create matching copies of your Airtable database and Webflow CMS Collection to ensure the data syncs correctly. For example, if you scraped a Company Name, Website, and Logo Image URL you need to add the same data columns in both Airtable and Webflow.
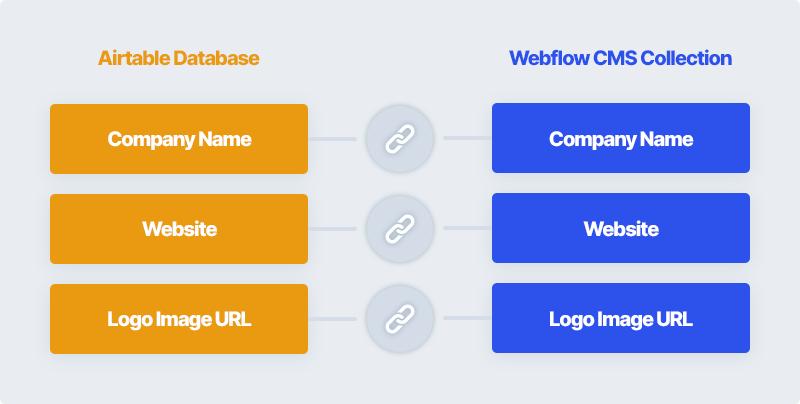
Once you’ve made the clone databases, you will want to manually enter a test item into your Webflow CMS Collection and export a CSV file. This will export some unique collection item data that Webflow automatically generates for any new database entry. Most importantly, you need the unique identification number for that record called an “Item ID”.
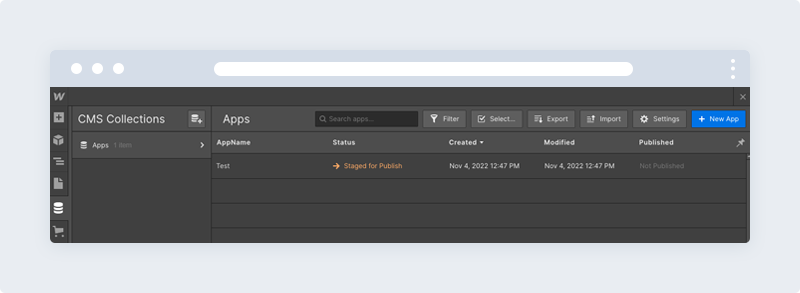
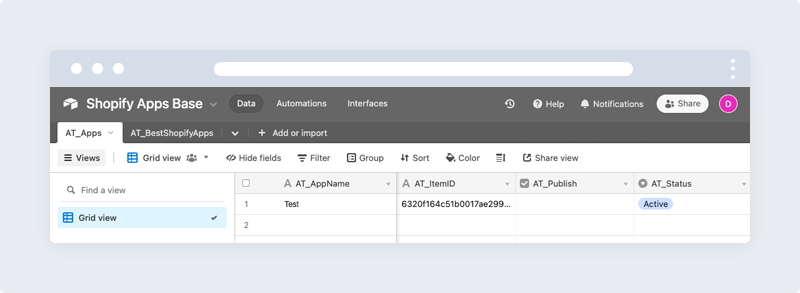
Going back to Airtable, you need to add the new collection item data points that were generated by Webflow. These items include the “Item ID”, “Publish”, and “Status” columns. Using the CSV that was exported from Webflow, manually copy and paste that data into your Airtable database.
Now the syncing can begin. Using an extension called Nobull in Airtable, you can connect and sync between your Airtable and Webflow databases.
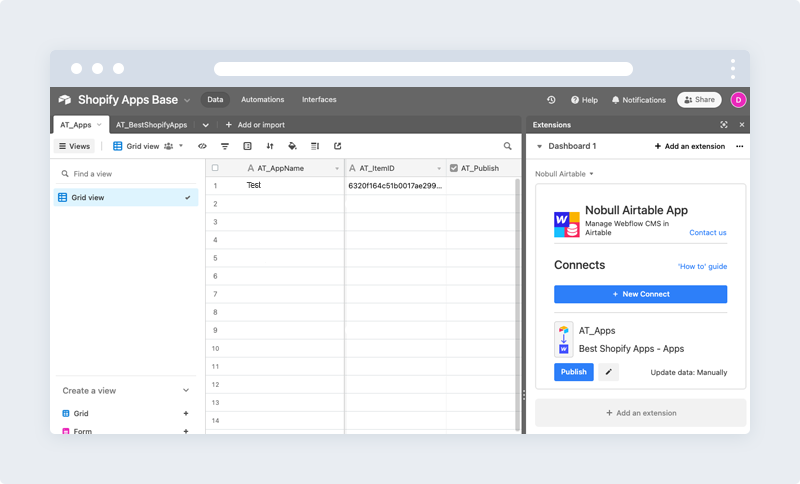
Once you’ve linked up the two databases using Nobull, you can make a second test item in Airtable and rerun the sync. If all goes according to plan, you should see the new item show up in your Webflow CMS Collection.
Now you can begin to import your scraped data into Airtable and sync your data points into Webflow. Technically we could use the Webflow CMS Collection as our sole database, but Airtable is a much more flexible tool to manipulate and automate aspects of our data.
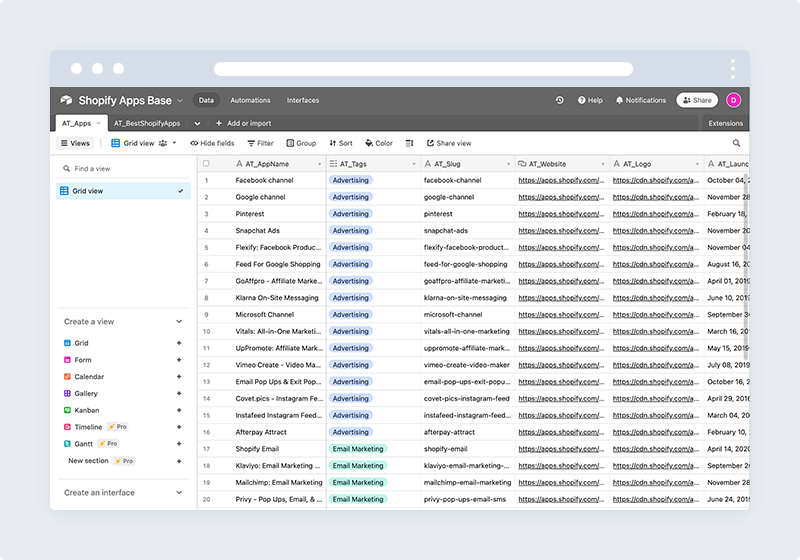
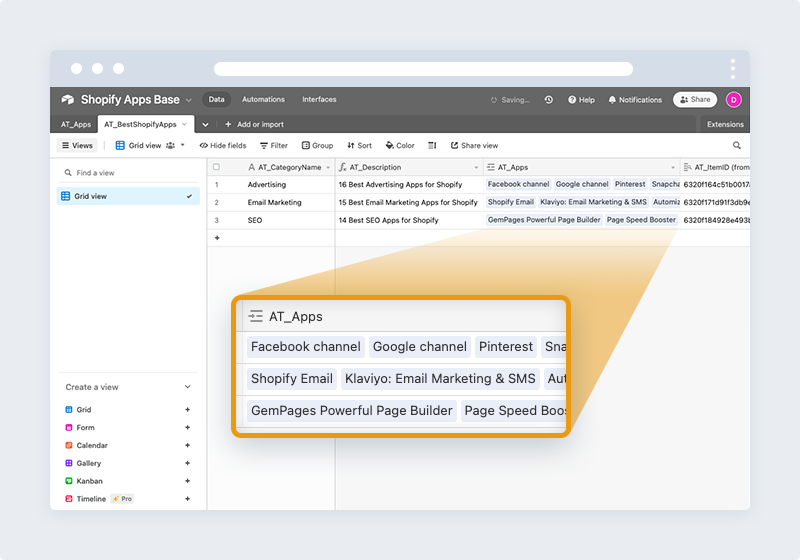
For our best Shopify apps directory, we have two tables housing our data. Table one is a comprehensive list of all the Shopify apps and their specific data points (see above). The second is a list of app categories that link to and classify the records in our first table (see below).
Webflow CMS Template
Once you have your databases setup, you can start to create your Webflow CMS Collection page. Anytime you create a new item in a Collection, a page is automatically created for it. Collection pages work like templates — the layout and design of the Collection page applies to all automatically generated item pages.
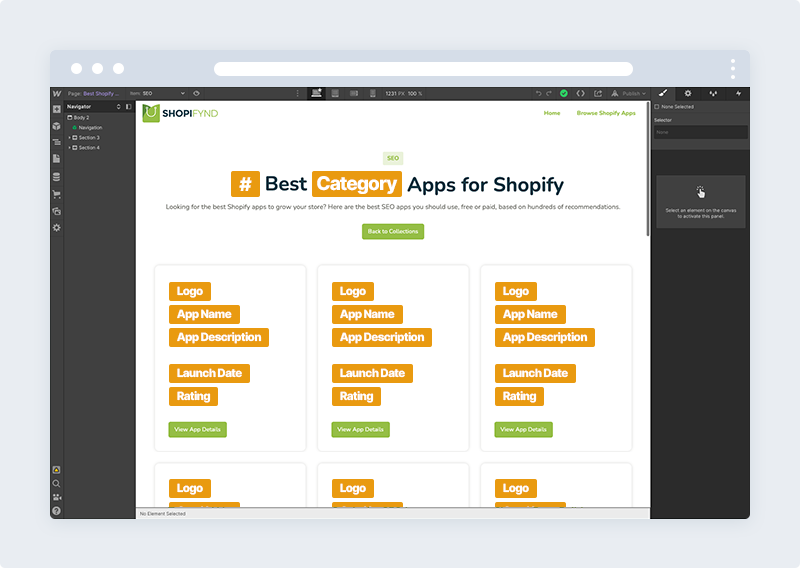
You can design and develop the Collection page just like any other static page — but the power of Collection pages comes when you want to add dynamic content into that design. Just like with Collection lists, elements dropped into a Collection page are static until they are connected to a field from the Collection.
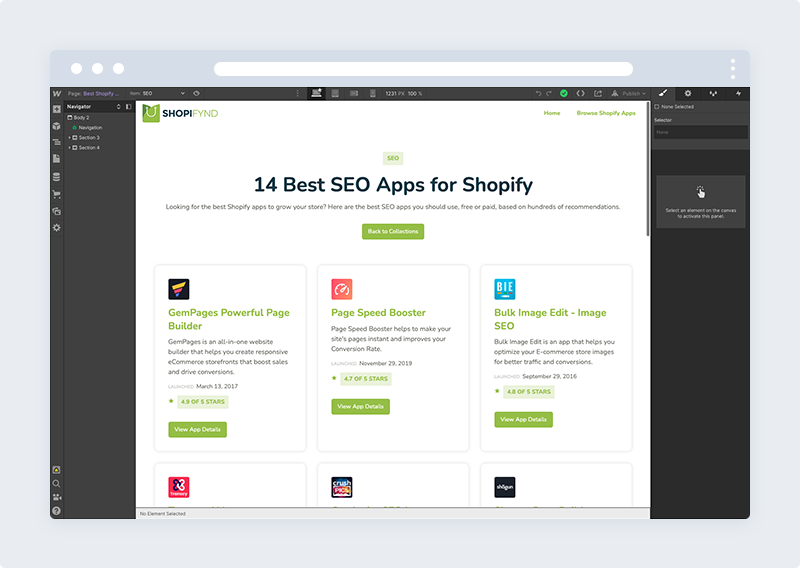
In our Shopify app example, we used a Collection list to populate the three column card grid. Once we set up the design for the first card, the other cards were automatically populated with the app information in that Collection. On top of this, Webflow will also automatically generate the app pages for each category as well.
SEO Optimization
Webflow is great for SEO optimization and has a number of features that can help your website rank higher in search engine results pages. There are a variety of ways to improve your SEO using the inbuilt Webflow tools.
Design Responsively
Mobile optimization ensures that mobile visitors have an experience optimized for their mobile device and takes into consideration site design, site structure, page speed and more to ensure a quality mobile user experience. Google provides some guidelines regarding mobile-friendly websites in which it mentions that only mobile-friendly websites will get more ranking than non-mobile-friendly websites.
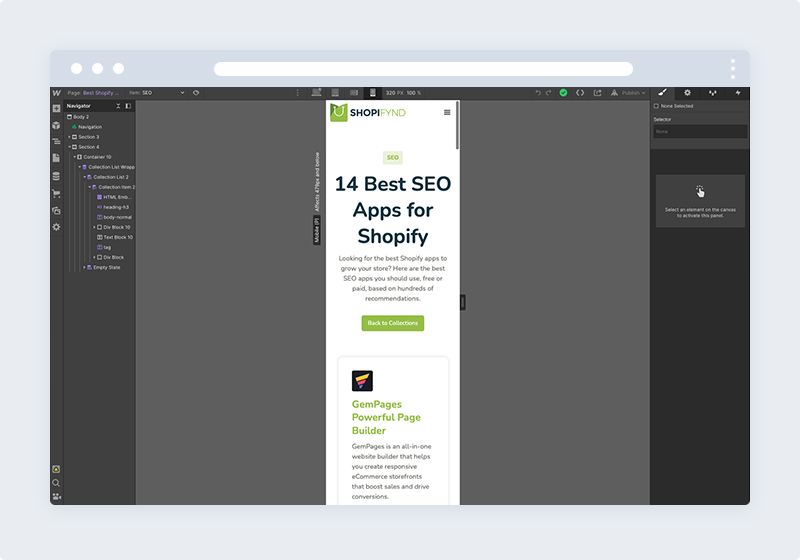
Webflow was built for responsive design. It allows you to preview your site at different break points (desktop, tablet, mobile landscape, and mobile portrait) and make changes to the mobile views without altering the desktop view.
Titles and Meta Descriptions
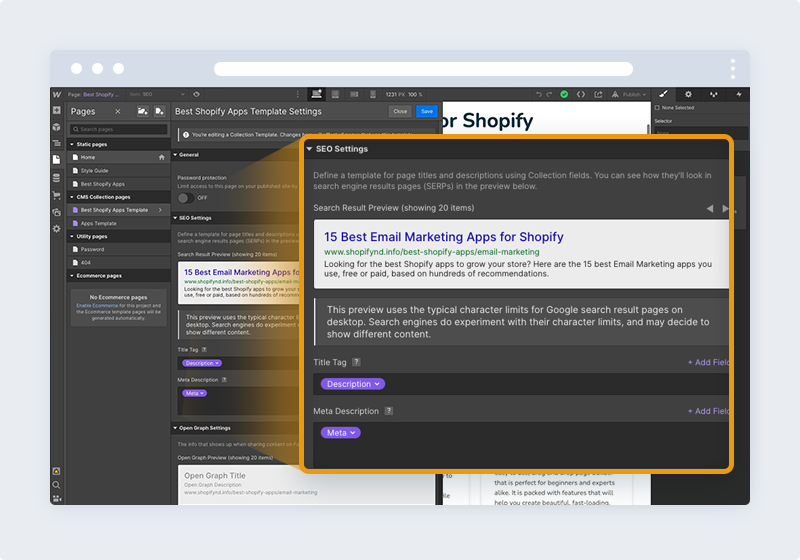
Meta titles and descriptions provide a text preview of your page’s content. Compelling meta description copy can help drive more clicks. A high click-through rate, in turn, is a positive SEO factor. The more people click to your website — the more value Google believes that it provides — the higher it will rank.
The same method of dynamically pulling data from our Collections can be used to automatically populate the meta titles and descriptions on our programmatically generated pages. By adding these descriptions in Airtable and syncing to Webflow, you can include unique meta data for every page.
Use Proper Header Tags
Title tags help both readers and search engines process the content of your page and understand how different pieces of information relate to one another. They capture the main topic and subtopics.
Adding relevant keywords to headers helps describe the page content better. But keywords alone won’t guarantee higher rankings. When creating page titles, think of usability over SEO. Assign proper H1, H2, and H3 titles to denote hierarchical levels of information.
Google Site Verification
Google verification allows you to verify ownership of a domain so you can use the Google Search Console tools. These tools give you access to Google search data and allow you to submit your sitemap so that your site is indexed in Google search results.To add your website to the Google Search Console:
To add your website to the Google Search Console:
- Go to the Google Search Console and log into your Google account
- Add a new property from the property dropdown
- Choose “URL prefix” and type in your domain with the https:// protocol (ex. https://www.domain.com)
- Choose the “HTML tag” option under other verification methods
- Copy the Verification ID (string of numbers and letters in between the quotations that appear after "content="). Don’t close the window!
In another browsing tab:
- Open your Webflow dashboard and go to your project’s SEO settings
- Paste the verification ID you copied in the Google site verification field
- Save the changes
- Publish your site
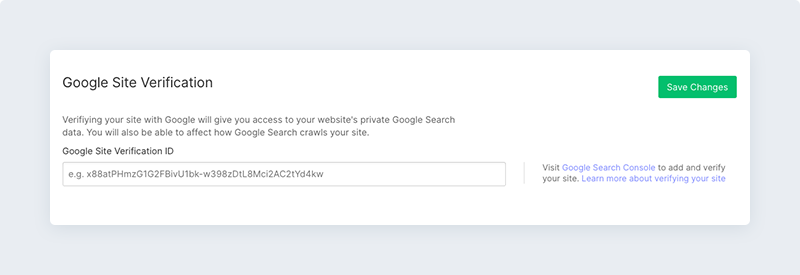
To verify your site:
- Return to the Google Search Console and press “verify.”
- If you’ve closed the property verification window, open the property dropdown and select the domain you want to verify. Choose the “HTML tag” option again and click “verify.”
Submit to Google for Indexing
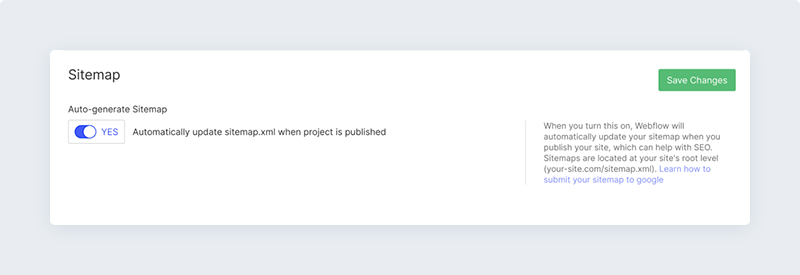
You can enable the auto-generated sitemap of each project in the Project settings of that project. The setting is located in Project settings → SEO tab → Sitemap section. Make sure to save the changes and publish your site.
Once you've done that, Webflow will automatically generate the sitemap.xml of that project and update it each time you publish your site.
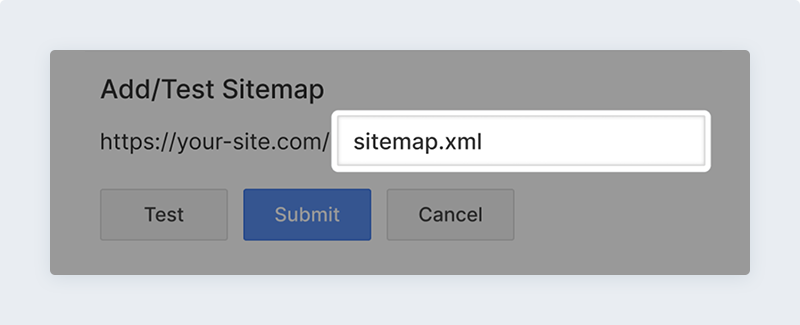
You can submit your sitemap through your Google Search Console. Choose the website you want to submit the sitemap of, then type “sitemap.xml” into the input field and press “submit”.
Optimize Page Load Speed
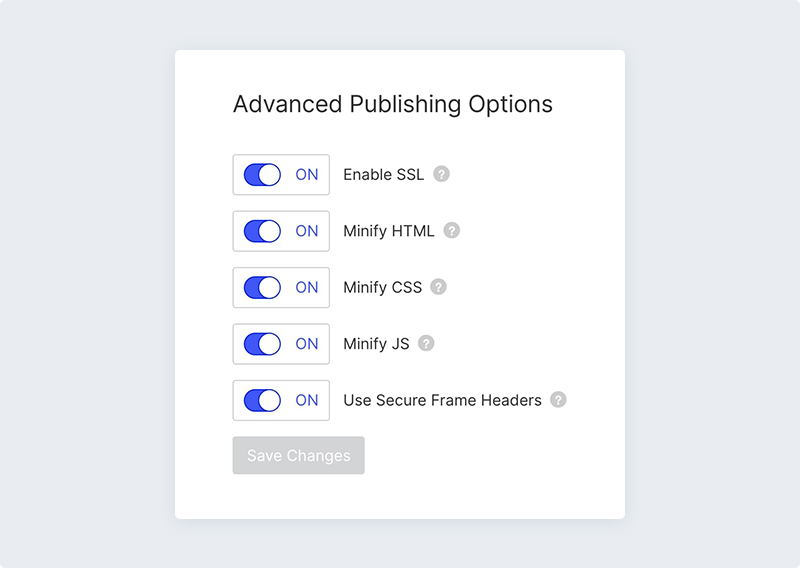
In the hosting tab of your project settings, you can enable (or disable) a few features that will help speed up your website. It’s a good SEO practice to enable all of these. This way, you can keep your website secured with an SSL and help speed up your websites by minifying HTML, CSS, and JS.
Final Thoughts
Programmatic SEO is a creative way to find your customers without competing with the big budget, big traffic sites. Hopefully, you’ve learned how powerful it can be to capitalize on opportunities to target long-tail keywords with low competition. And with a little technical savvy you can take advantage of this process yourself, even with little to no coding skills. If you’re interested in the details of how we built our example website, check out the Programmatic SEO Course.